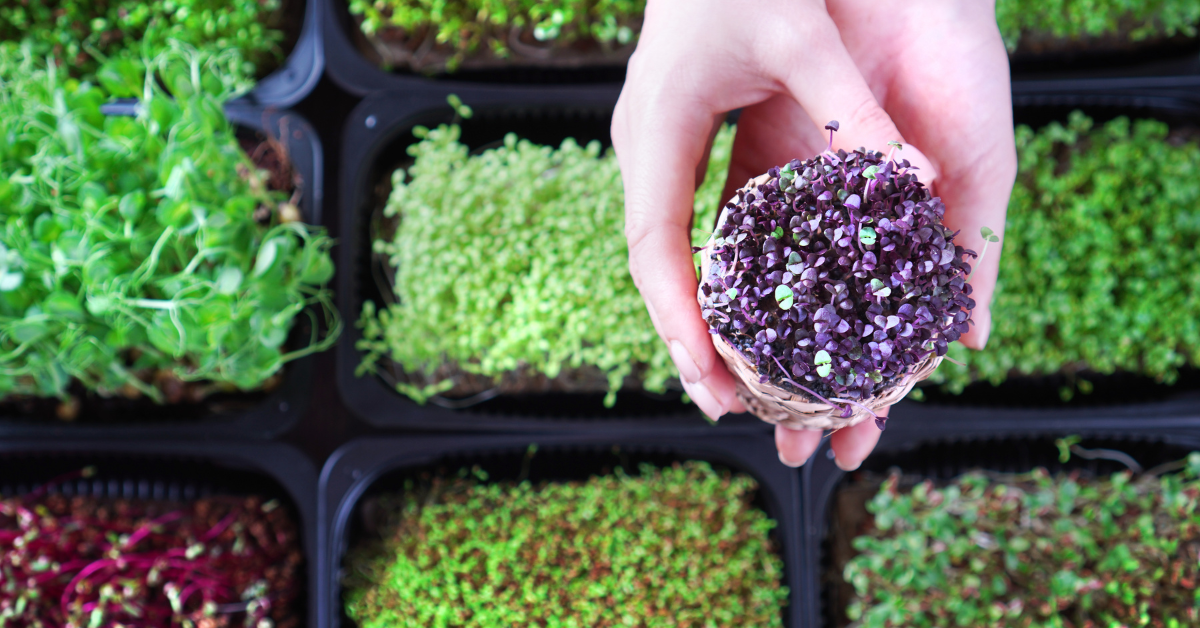
Microgreens have become a popular choice for urban gardeners looking to grow fresh, nutrient-rich produce in small spaces. These tiny greens pack a punch when it comes to health benefits, offering high concentrations of vitamins, minerals, and antioxidants. Plus, they’re incredibly easy to grow indoors, making them perfect for city dwellers or anyone with limited outdoor space.
This guide will take you through everything you need to know about growing microgreens at home, from choosing seeds and setting up your garden to harvesting and using them in delicious, nutrient-packed meals. With just a few basic supplies and a bit of care, you’ll be able to enjoy fresh microgreens right from your windowsill or kitchen counter.
What Are Microgreens?
The Basics of Microgreens
Microgreens are young vegetable greens harvested just after the first true leaves develop. While they may look similar to sprouts, microgreens are grown in soil or a growing medium and are harvested later in their growth cycle. These tiny plants come in a variety of types, including kale, radish, basil, and broccoli, each offering distinct flavors from mild and earthy to spicy and peppery.
Microgreens are smaller than baby greens but larger than sprouts, and they’re packed with intense flavor. Unlike mature plants, which require weeks or months to grow, microgreens are usually ready to harvest within 7 to 14 days, making them a quick and rewarding gardening project.
The Nutritional Value of Microgreens
Microgreens are often celebrated for their high nutrient density. Studies have shown that they contain higher levels of vitamins and minerals compared to their mature counterparts. For example, microgreens can have up to 40 times more nutrients than fully grown plants, depending on the variety. These nutrients include vitamins A, C, E, and K, as well as antioxidants and beneficial phytochemicals.
The high concentration of nutrients in microgreens makes them an excellent addition to any diet, especially for individuals looking to boost their intake of essential vitamins and minerals without consuming large amounts of food.
Health Benefits of Incorporating Microgreens into Your Diet
Adding microgreens to your diet can offer numerous health benefits. The antioxidants in microgreens help reduce inflammation and support the immune system, while their fiber content aids in digestion. Additionally, microgreens are low in calories, making them an ideal choice for weight management. With their high nutrient density, microgreens can be a valuable component of a balanced diet, supporting everything from skin health to heart health.
Microgreens are also easy to incorporate into daily meals, whether sprinkled on salads, blended into smoothies, or used as a garnish. Their small size and big flavor make them a versatile addition to various dishes.
Getting Started with Microgreens at Home
Choosing the Right Microgreen Seeds
Not all seeds are suitable for microgreens, so it’s essential to choose seeds specifically labeled for microgreen cultivation. Look for organic or non-GMO seeds to avoid potential chemical residues. Popular choices for microgreens include arugula, basil, radish, sunflower, and pea shoots. Each variety has its unique flavor and nutritional profile, so choose seeds that suit your taste preferences and health goals.
For a beginner-friendly experience, start with fast-growing varieties like radish and mustard greens, which are easy to grow and ready for harvest within a week.
What You’ll Need: Tools and Supplies
Growing microgreens requires a few basic supplies, most of which are affordable and easy to find. Here’s a list of essentials:
- Growing trays: Shallow trays with drainage holes work best for microgreens. You can also reuse plastic containers as long as they’re clean and have drainage.
- Growing medium: You can use potting soil, coco coir, or hydroponic pads. Organic potting soil is an excellent choice for beginners.
- Seeds: As mentioned, choose seeds labeled for microgreens.
- Spray bottle: For gentle watering to avoid disturbing the seeds.
For those in low-light environments, consider adding a small LED grow light to help your microgreens thrive. Many microgreens require minimal light, making a windowsill sufficient in most cases.
Setting Up Your Microgreen Garden
Find a sunny location for your microgreen trays, such as a windowsill or kitchen counter. Ideally, microgreens should receive around 4-6 hours of sunlight per day. If natural light is limited, supplementing with a grow light can ensure consistent growth.
Arrange your trays in a way that allows for good air circulation, which helps prevent mold growth. With the right setup, you’re ready to begin planting!
How to Grow Microgreens: A Step-by-Step Guide
Preparing the Soil or Growing Medium
Start by filling your tray with about an inch of soil or other growing medium. If using soil, lightly tamp it down to create an even surface. Moisten the soil before planting but avoid soaking it, as overly wet conditions can lead to mold.
Some growers prefer hydroponic mediums like coconut coir mats or hydroponic pads, which retain moisture well and keep the growing process mess-free. Regardless of your choice, ensure the growing medium provides adequate support for the seeds.
Sowing the Seeds
Sprinkle your chosen seeds evenly across the surface of the soil, making sure they’re not too crowded to allow for air circulation. Gently press the seeds into the soil to ensure good contact. If your seeds require a light covering, sprinkle a thin layer of soil on top, but many microgreen seeds grow well when left exposed.
After planting, lightly mist the surface with water to keep the seeds moist. Cover the tray with a lid or plastic wrap to retain humidity during germination.
Watering and Caring for Microgreens
Check on your microgreens daily, ensuring the soil remains moist but not overly wet. Use a spray bottle to gently water them, as heavy watering can displace the seeds. Remove any covers once the seeds start sprouting, usually within 3-5 days, to allow for airflow and reduce the risk of mold.
Maintain a consistent watering schedule and keep the trays in a bright location. Microgreens grow quickly and require only minimal attention to thrive.
Harvesting and Using Microgreens
When and How to Harvest Microgreens
Microgreens are typically ready for harvest once they reach around 1-3 inches in height, usually between 7-14 days. Use scissors to cut the greens just above the soil line. Harvesting promptly not only ensures optimal flavor and nutrition but also reduces the chance of mold.
If you’re growing a larger batch, consider harvesting in stages so you can enjoy fresh microgreens over several days.
Storing and Preserving Fresh Microgreens
To store harvested microgreens, place them in an airtight container lined with a paper towel, which will absorb excess moisture. Stored in the refrigerator, fresh microgreens can last up to a week. For long-term storage, microgreens can be dried or frozen, but they’re best enjoyed fresh for maximum flavor and nutrition.
Avoid washing microgreens until you’re ready to use them, as excess moisture can cause them to spoil faster.
Incorporating Microgreens into Your Meals
Microgreens add both flavor and a nutritional boost to meals. Try sprinkling them on salads, blending them into smoothies, or using them as a garnish for soups and sandwiches. Their vibrant color and distinct flavors can elevate simple dishes, making them both healthier and more visually appealing.
Experiment with different microgreen varieties to find flavor combinations you enjoy. Their versatility means you can get creative in the kitchen, incorporating them into dishes in countless ways.
Troubleshooting Common Issues
Dealing with Mold and Fungal Growth
Mold is a common issue in indoor microgreen gardens, especially in humid environments. To prevent mold, ensure good air circulation, avoid overwatering, and maintain moderate humidity levels. If you do notice mold, you can remove it with a cotton swab dipped in a hydrogen peroxide solution to protect the surrounding plants.
Keeping your microgreen trays clean and dry between harvests will also help minimize the risk of mold and fungal growth.
Managing Light and Water Requirements
Different microgreen varieties have specific light and water requirements, so adjust these based on the type you’re growing. Signs of overwatering include soggy soil and drooping leaves, while underwatered plants may wilt or turn yellow. Check your plants daily to ensure they’re receiving adequate light and water for optimal growth.
Pest Control for Indoor Microgreen Gardens
While indoor microgreens are generally low-risk for pests, occasional issues may arise, such as aphids or gnats. For natural pest control, consider using neem oil or introducing predatory insects like ladybugs. Keeping the area clean and free of decaying plant material will also help deter pests.
Regularly inspecting your microgreens and using preventative measures ensures a healthy and pest-free garden.
Conclusion
Growing microgreens at home is a simple and rewarding way to bring fresh, nutrient-dense produce into your diet. These tiny plants are perfect for urban gardeners, offering a quick and easy crop that thrives in small spaces. With minimal supplies and effort, you can enjoy a continuous supply of fresh microgreens that add both flavor and nutrition to your meals.
Whether you’re a seasoned gardener or a beginner, cultivating microgreens is a fantastic entry point into urban gardening. Start your microgreen garden today and experience the satisfaction of growing your own superfoods right from the comfort of home.


